
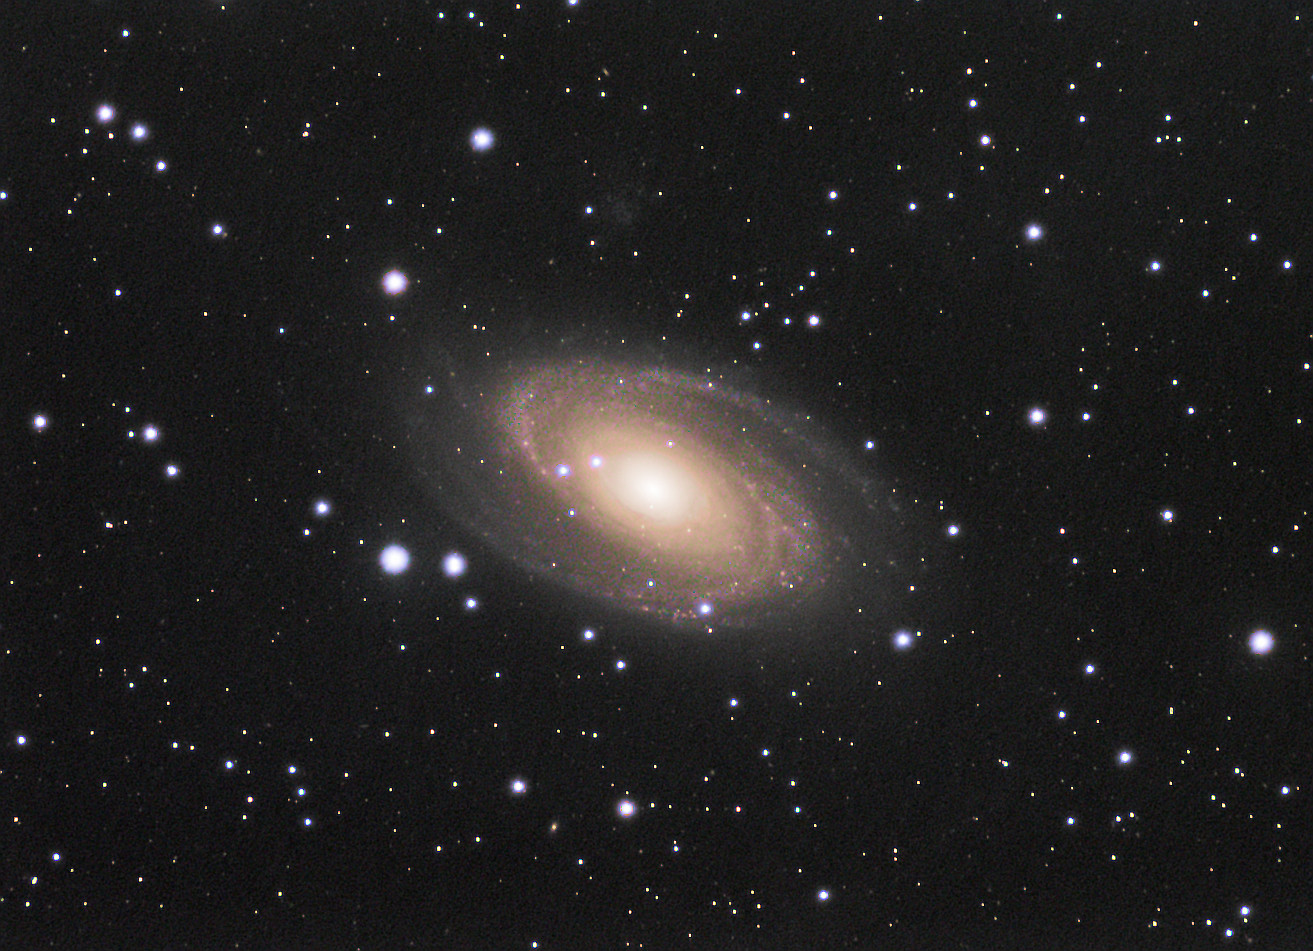
M81 Bode’s Galaxy in 11.6 hours
Telescope: William Optics ZenithStar 71mm f/5.9
Camera: Atik 314E CCD (Read Noise 5.3e-, Full Well Depth 13400e-)
Filters: Optolong LRGB
Mount: Unitron Model 152
Tracking: Self-designed R.A. stepper motor with PPEC on Raspberry Pi 3B
Image Acquisition: Astroberry INDI/Ekos on Raspberry Pi 3B+
Remote Guiding Assistance and Polar Alignment: SharpCap 3.1
Image Processing: AstroPixelProcessor (APP) version 1.076
Over five sessions:
L: 250x90s bin1, 6.25 hours, SNR 17.78
R: 90×85.8s bin2, 2.13 hours, SNR 10.74
G: 90×50.2s bin2, 1.26 hours, SNR 10.66
B: 90×77.8s bin2, 1.95 hours, SNR 10.63
Total Integration time: 11.59 hours
Total target SNR: 25.65
A quick survey of AstroBin reveals a startling variation of colors from members’ images of M81. One would think that there should be consensus. Top Picks did converge on a color scheme where the core is yellow and the arms are blue. I was keen on duplicating that result with little post-processing since I meticulously white balance my RGB filters. (This explains the strange looking exposure times that I use.)
I chose this Top Pick image at AstroBin as an accurate depiction of the galaxy’s color https://www.astrobin.com/385501/0/ . Notice he invested 30 hours to capture it. My method reduced the time to about 12 hours but I forfeited detail to achieve it.
Thankfully my equipment worked flawlessly but I did have to cope with a user error (me) on the last night from which I was able to recover.
Problems began during post-processing. The color balance was off. The galaxy was predominantly yellow with just a hint of blue in the outer arms. Here is that initial image:
It took a day to solve but first let me explain that unlike a lot of astrophotographers I do not like to rely on software to perform color balancing. I prefer to get it right at the telescope.
A key component of my color balancing strategy is to white balance my filters against a Sun-like star. What I failed to realize is that there needs to be another component that accounts for atmospheric extinction. Atmospheric Extinction is an estimate of the amount of atmosphere between you and the galaxy. It is a function of the galaxy’s altitude above the horizon. The brightness diminishes the closer to the horizon, and grows as it reaches overhead.
I’ve known of atmospheric extinction and its effects for quite some time. I’ve chosen to mitigate its effects by selecting the red filter first, followed by green then blue. This is for objects east of the meridian. This strategy worked well up until this galaxy M81.
The essential difference between a galaxy like M81, Bode’s Galaxy, and M31, the Andromeda Galaxy, is that M31 faces east and M81 is circumpolar. Circumpolar means that it never sets since it is so close to Polaris. This also means that M81 never gets very high in the sky. It reaches 62 degrees above the horizon whereas M31 almost reaches 90 degrees. M31 becomes much brighter in the telescope when it is close to overhead. M81 never reaches those heights. The end result is that M81’s blue filtered images are less bright than M31’s.
I performed a mathematical analysis and discovered that M81’s blue stack of images is less bright than its red stack. This explains why the initial print of M81 is so weak in blue.
One solution is to go back to the telescope and capture more blue images. A second solution is to delete some of the 90 red images but keep all 90 blues. A third solution is to leave the images alone and to use the controls in AstroPixelProcesssor (APP) to attenuate the red stack. I chose to do the latter.
To get the color balance right I needed to attenuate the red stack by 17% and the green stack by 10% while keeping the blue stack at 100%. Here is the final processed image:

I have since developed a spreadsheet to assist me in capturing the proper number of images per filter. I’ll use that going forward.