Month: July 2019

You’ve got a Dew Management problem

You’ve got a Dew Management problem

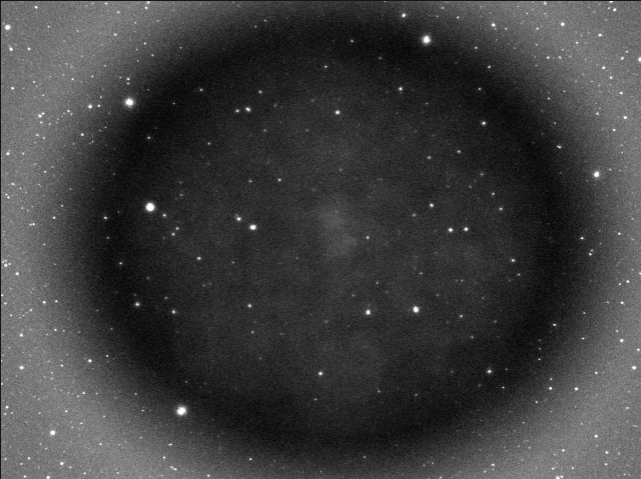
Dew is condensed water vapor that likes to form on optical surfaces whenever the relative humidity is high. The featured image shows a dew drop that formed on my camera’s sensor window shortly after I turned on the thermo-electric cooler. It ruined a night’s worth of astrophotography because I did not have a plan in place.

My first experience with dew was two years ago. The sky was clear but I could see my breath and the grass was glistening with moisture. When I began my imaging run the computer screen showed bright stars and dark space but as the night wore on I noticed that the image looked increasingly less defined. When I shined a light on the objective lens of my refractor I saw that it was fogged over.

Don’t let this happen to you. Clear nights are hard to come by so don’t waste it by not having a dew management plan. There are several vendors who have solutions that consist of heater bands and a controller for adjusting the temperature. Me, I am a Do-It-Yourself person, so I like to build my own. I’ve built a couple homemade heater strips as described here at DewBusters website:

http://www.dewbuster.com/heaters-330ohm-resistors.html

I don’t have a controller so if you build a heater strip according to those specifications you will find that it runs hot when you apply a constant 12VDC across it. Now I tend to build strips with half the number of resistors such that it runs at half power. I solved the dew problem on my sensor window by building a small heater strip that fits nicely around the camera’s nose-piece using Velcro.

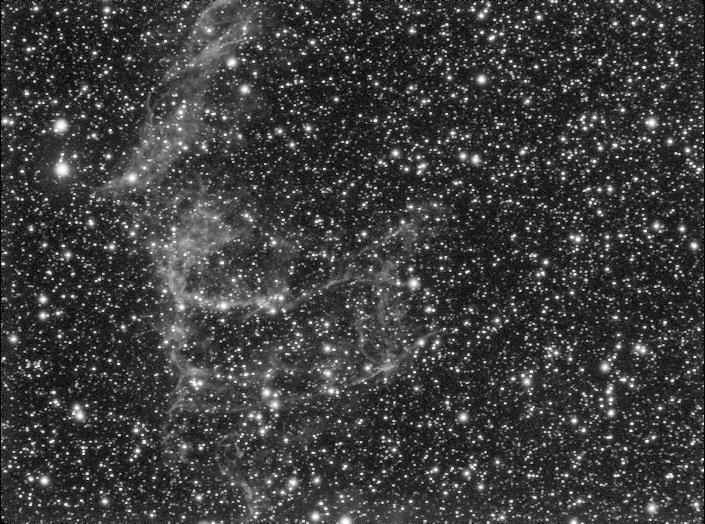
The other night as I prepared to image the Eastern Veil Nebula I purposely disconnected the dew heaters earlier in the evening to conserve battery power as I waited for the target to rise above the treeline. When the time came I engaged the cooler, waited 20 minutes for the temperature to stabilize, and then took a test shot. Right away I knew what the problem was. I ran outside, reconnected the dew heaters and after only five minutes I could see the dew had evaporated.

Eastern Veil Mosaic

Eastern Veil Mosaic

Astro Pixel Processor (APP) has a powerful tool for creating mosaics. Last night I tested it out. The result is stunning:

My camera has a small field-of-view. It cannot fit the entire nebula in one shot. It must be broken up into two panels. Here is a screenshot of my planetarium software C2A. I used it to plan where to position the telescope. The two overlapping red rectangles indicate the framing. As shown there must be some overlap in order for APP to do its magic:

Each panel consists of 50 individual images using a 73-second exposure. The first step in creating the mosaic is to stack those 50 images to create the upper panel:

Followed by the lower panel:

By the way you may have noticed when you enlarge each image that the stars look square. That was due to the choice I made to capture each image using 2×2 binning, essentially reducing each 2×2 matrix of pixels to one pixel. I did that to boost the signal-to-noise ratio at the cost of resolution. The luminance filter was used for all images, no narrowband.

This summer and fall I plan to create a 15-panel color mosaic of the Andromeda Galaxy.

Cocoon Nebula in LRVB

Cocoon Nebula in LRVB

The Cocoon Nebula lies in the constellation Cygnus in one of the nearby arms of our Milky Way galaxy. In the distant past the nebula gave birth to a cluster of highly energetic stars. The energy from those stars ionize the hydrogen gas, causing it to glow red. The technical classification of this nebula is IC 5146, a bright emission nebula, but there is another nebula, a dark nebula named Barnard 168. You can see hints of it immediately surrounding IC 5146, a region relatively devoid of stars that extend to the upper right-hand corner of the frame. In fact this dark nebula extends a great distance from what you see here. Do an internet search of “Cocoon Nebula” to see wide-field images that show it. If you live atop a mountain or somewhere with exceptionally clear skies away from city lights, dark nebulae can be seen as smokey gray regions.

This was an experiment that fortunately succeeded. I say fortunately because it enables me to practice both astrophotography and photometry using only four filters instead of the usual six. Normally astrophotography requires four filters: luminance, red, green, and blue (LRGB for short). Photometry requires a minimum of two filters: “V” and “B”.

My filter wheel has only five slots. So how did I fit six filters into five slots? I didn’t. I simply replaced the G and B filters with the photometric V and B. I call it LRVB instead of LRGB.

The photometric V filter looks green when you hold it up to light and the B filter looks blue. I knew for a fact that I needed to “white balance” them in order to determine the proper exposure for each. I performed that task last week. I thought it would end there but I was mistaken.

When the time finally came to process all of the images I was disappointed. The colors were muddy looking. What was the problem? The answer lies in the dissimilar spectral response of the filters. The traditional G filter passes light between 500nm and 600nm whereas the photometric V filter passes light between 475nm and 650nm. So the V filter passes some light into what is traditionally the blue and red bands! Furthermore the photometric B filter is slow to pick up light in the blue band but is aggressive in deep blue to ultraviolet.

The solution was found in AstroPixelProcessor (APP) which provides a tool to combine the individual LRVB stacks into a single color composite image. Originally I told APP to assign 100% of the V-stack to the green channel but that resulted in muddy colors. This time I told it to assign 75% to the green channel and 25% to the blue channel. That was the solution!

The technical details

William Optics 71mm f/5.9
Atik 314E CCD (cooled but not set-point)
Optolong Luminance and Red filters
Astrodon Photometric V and B filters
Unitron Model 142 German Equatorial Mount.
Tracking: Own design Permanent Periodic Error Correction (PPEC) using stepper motor and Raspberry Pi Model 3B.
Flat-fielder: Own design “The Flatinator”

Exposure:
Luminance (binning 1×1): 70x 60s using Optolong Luminance filter
Red (binning 2×2): 70x 73s using Optolong Red filter
Green (binning 2×2): 70x 45s using Astrodon Photometric V filter
Blue (binning 2×2): 70x 92s using Astrodon Photometric B filter

Flats: 50 each filter
Darks: 50 each filter
Bias: 100x 1ms

Total Integration Time: 5.25 hours

Captured with Astroberry/INDI/Ekos on Raspberry Pi Model 3B+.
Processed in Astro Pixel Processor (APP) and GIMP.
White Balancing using a method described by Al Kelly: “White Balancing RGB Filters with a G2V Star”

Bortle 5 site
Transparency: Average
Seeing: Average