High Dynamic Range (HDR) Photography using Photomatix
While I wait for the weather to improve for astrophotography I discovered High Dynamic Range (HDR) photography through a friend in Great Britain. HDR is commonly used by real estate agents to capture beautiful sun-drenched living spaces. Astrophotographers have used HDR to capture stunning images of the Crescent Moon bathed in Earthshine and images of Total Solar Eclipses. There might be other applications that I want to explore.
Many years ago I was heavily engaged in conventional photography of landscapes and portraiture. This was at a time before digital photography. Portraits were the easiest to capture since they were obtained in a controlled environment of a studio. Shadows that would normally render in black could be filled with flash or flood lights. Highlights that would normally appear washed out on film could be softened with light diffusers.
By far the most difficult was landscape photography. There you didn’t have the option of using flash, flood lights, or light diffusers. You relied more heavily on darkroom techniques. Things changed with the advent of digital photography.
Photomatix is a software product from HDRsoft Ltd, a UK company. They have several versions, some that integrate well with Photoshop, others that are standalone applications. I chose the standalone version for Linux since I find myself increasingly turning away from Windows in favor of Linux. The trial version never expires and is full-featured but they do draw the Photomatix watermark on your final image. The cost of a license is reasonable at $49. For this test I am using the trial version. The software is very easy to use plus there are many videos available on YouTube to learn how to use it to its fullest extent.
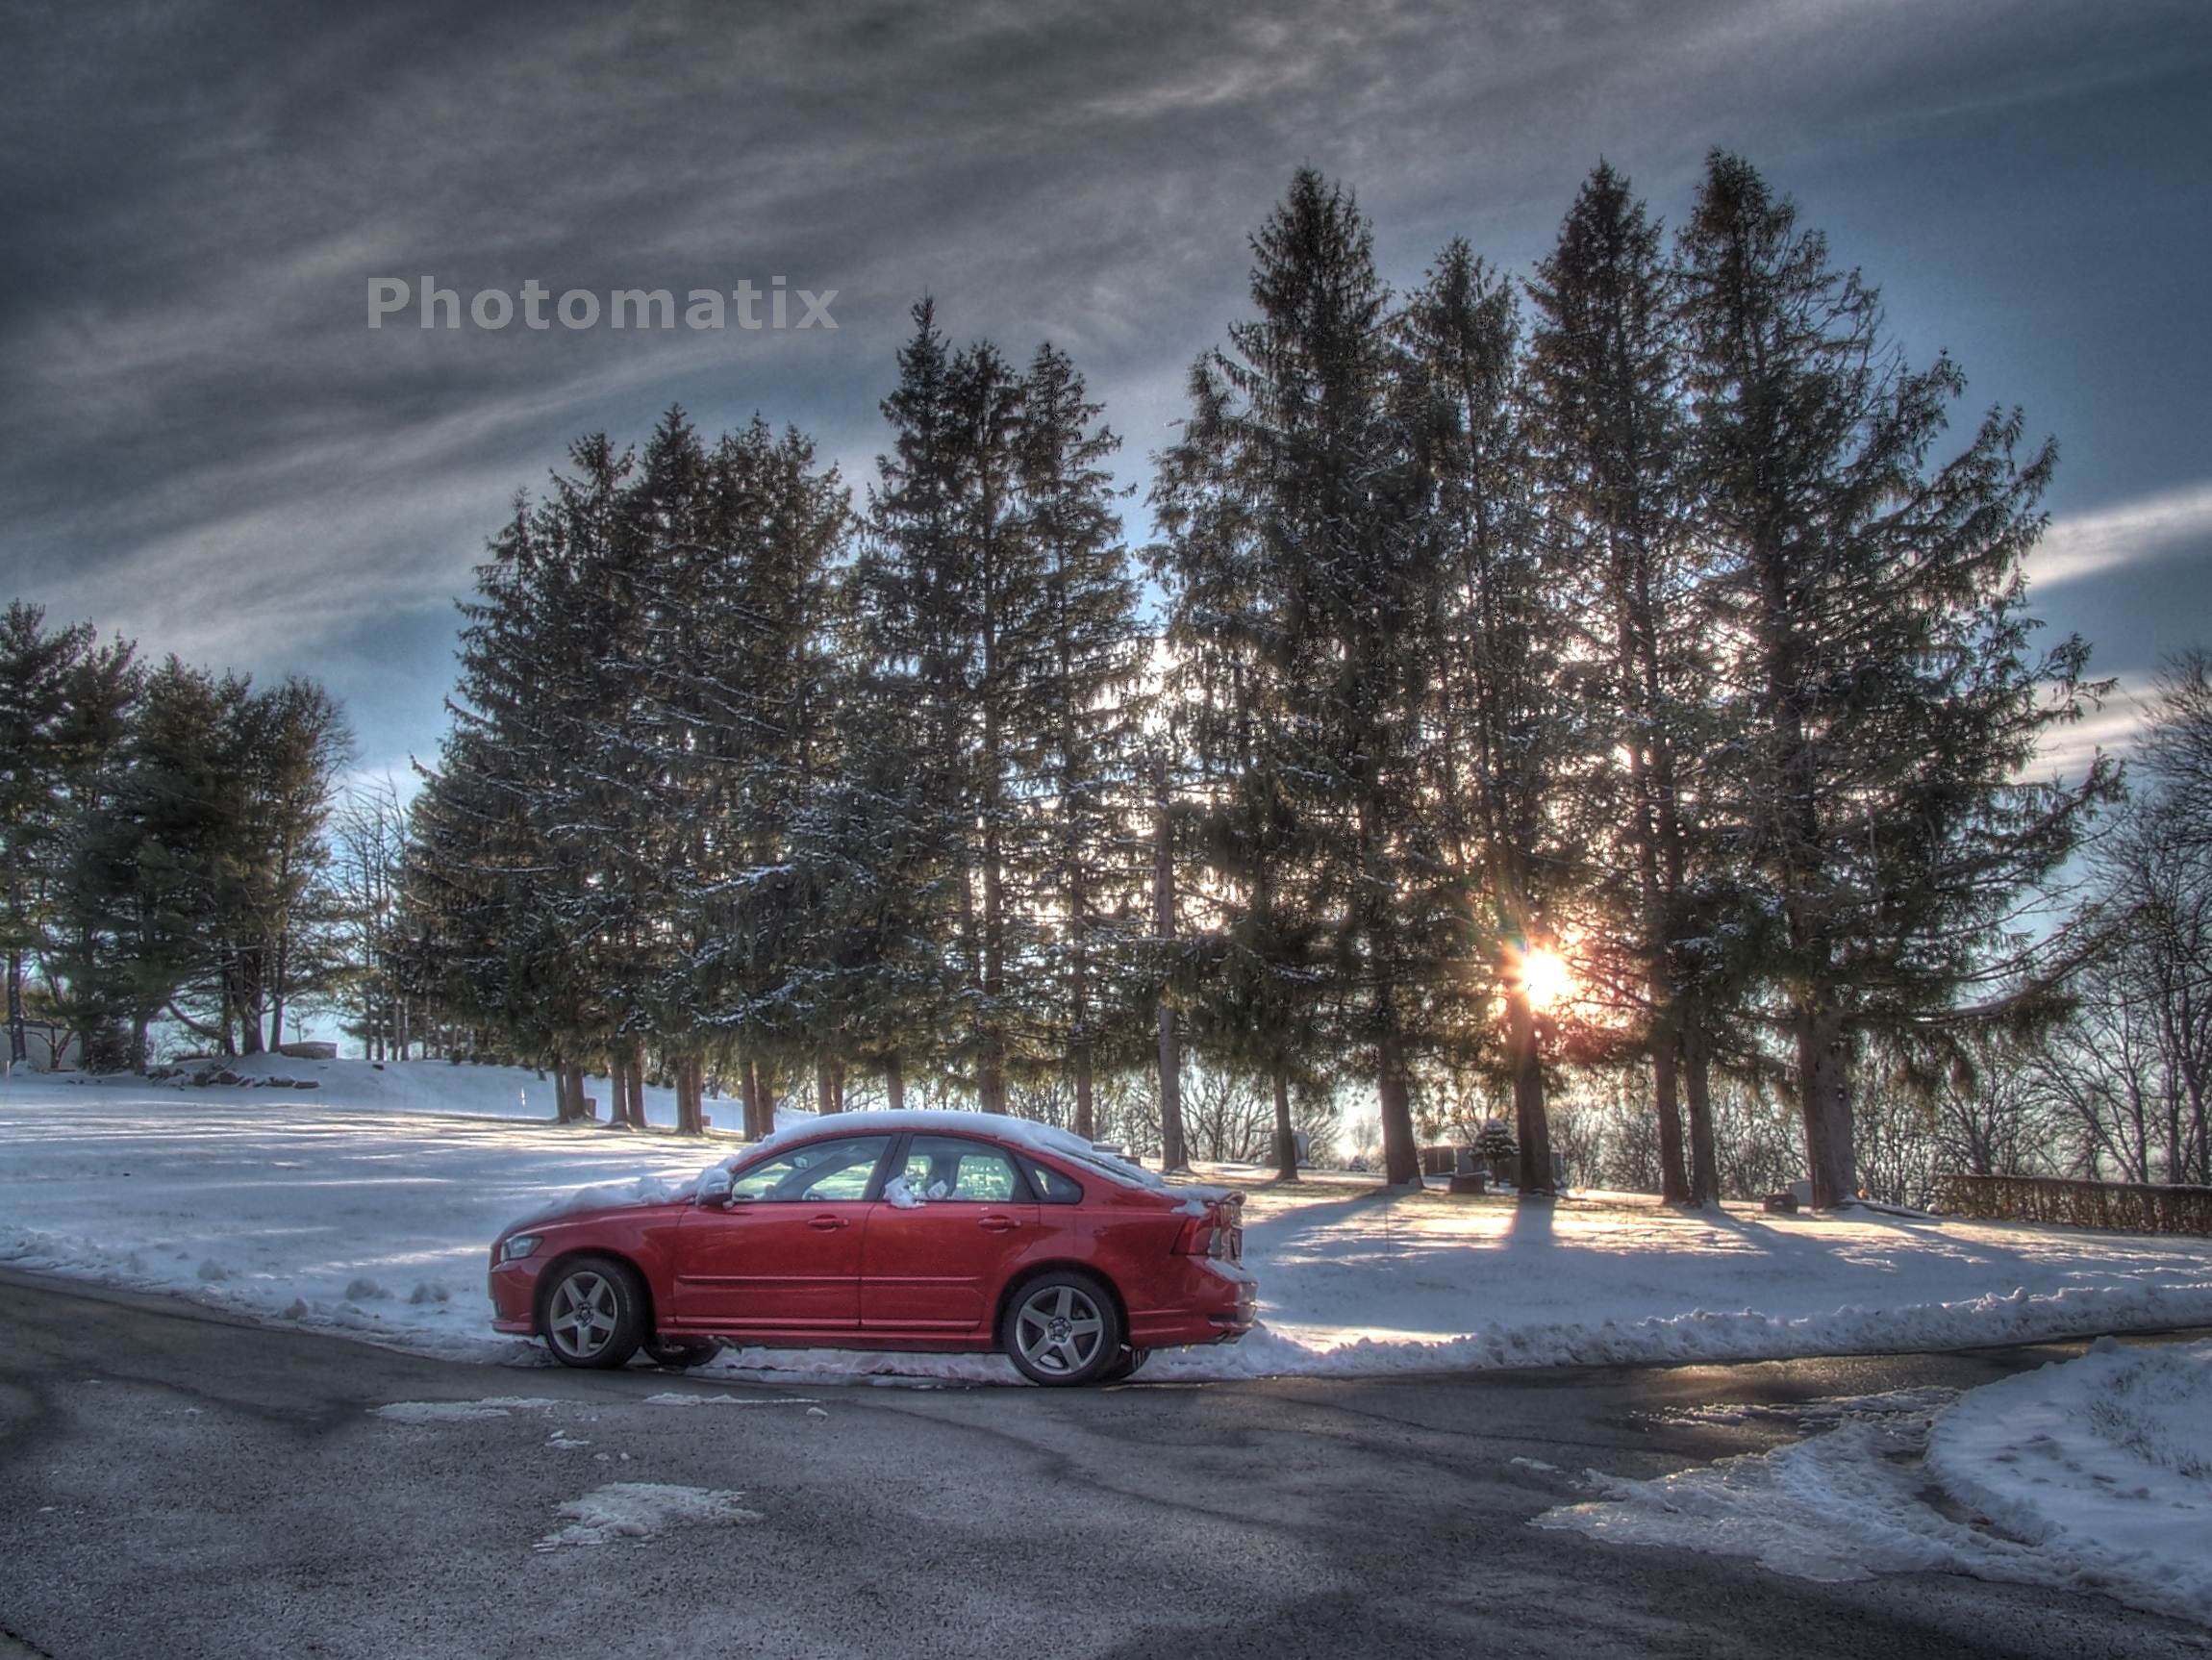
The difficult part is capturing the images. Instead of me yammering on attempting to explain what to do, allow me to present the seven photos that I input into Photomatix:
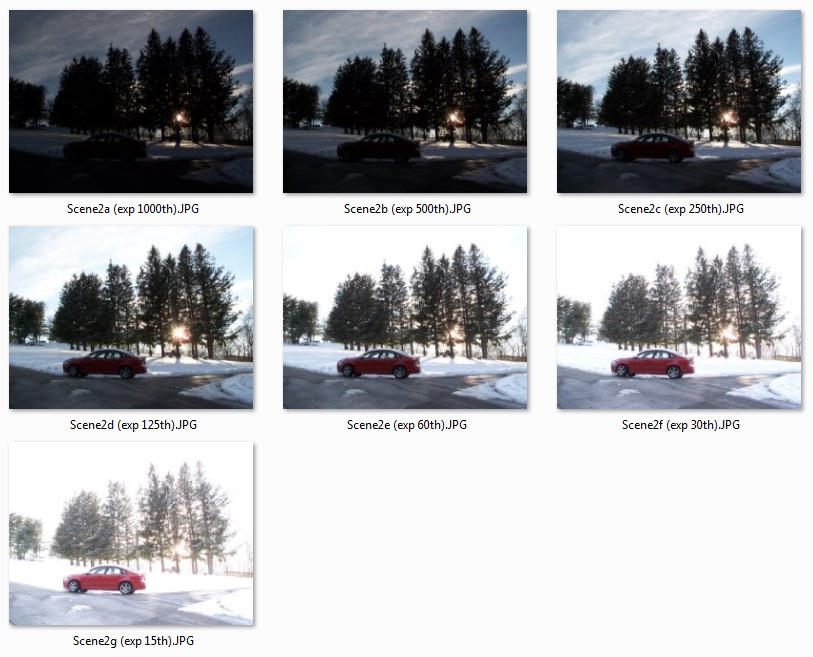
The essential parts of the scene are the sky, the snow, the car, and the snow on the limbs of the trees. The sky and the snow on the ground are the brightest parts. The car and tree limbs are the darkest. The objective is to capture detail in all of them. Notice that there is no single exposure that satisfies us. Perhaps the closest is “exp 60th” but notice how the sky is completely blown out. This scene is a perfect candidate for HDR using Photomatix.
Notice that my exposures range from 1/1000s to 1/15s. I chose 1/1000s because it showed the best detail in the sky and the snow on the ground. I chose 1/15s because it showed the best detail in the car and the tree limbs. Once I determined those endpoints then I proceeded to capture images in full-stop increments: 1/1000s, 1/500s, 1/250s, 1/125s, 1/60s, 1/30s, 1/15s. It is important to keep the same f/stop. In my case it was f/7.
My camera is rather old so it does not have auto-bracket mode. No worries, I used manual mode instead. My camera has an integrated spot meter. Wherever I point the camera it will read out if it is under-exposed or over-exposed. The meter readout is around the center of the view.
The steps are:
- Choose an f/stop.
- Adjust the zoom to frame the scene as you like.
- Point the camera at the brightest part of the scene, in my case the sky and ground snow.
- Adjust the exposure setting so that the meter reads zero (neither under-exposed nor over-exposed). Make a mental note, in my case 1/1000s.
- Point the camera at the darkest part of the scene, in my case the car and tree limbs.
- Adjust the exposure so that the meter reads zero, in my case 1/15s.
- Attach the camera to a tripod.
- Double-check the framing.
- Click the button to capture the frame. (This should be at our current setting of 1/15s.)
- Adjust the exposure one full-stop, in my case 1/30s.
- Click the button to capture the frame.
- Repeat these steps until you capture the last frame at the terminal exposure, in my case 1/1000s.
That’s it! Download the images to your computer and process in Photomatix. I’ll leave that activity for you to figure out. There are plenty of video resources for that. Good luck!